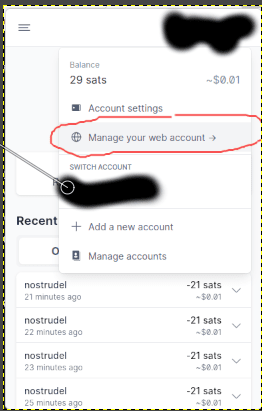
The vast majority of users that utilize LN address for receiving bitcoin as tips or zaps appear to be using custodial wallets (most commonly I see Wallet of Satoshi and Alby, but there are others too such as ln.tips or stacker.news). I’m not here to make a judgment on that usage, but there may be users out there that would prefer to cut out the middle man and reduce their counter-party risk. Problem is, hosting a domain and setting up an ln address to receive sats to one’s own node is outside of the capabilities or time allowance of most (including this writer). And with that said, I’ll present a decent compromise to this issue. For my very first write-up, I’m going to walk you through the latest thing I’ve been toying around with. Alby has this cool feature where you can update your Alby ln address to forward sats directly to your LND node. This means any zaps or tips one receives to their Alby ln address are not sitting in your custodial Alby account and are paid directly to your LND node. Disclaimer: Receiving zaps in this fashion can come with some privacy concerns, so if that is a concern of yours then you should probably not use this tool. As will be the case with most write-ups I do, I am going to walk you through this setup with an LND node running in start9 OS. So, it will likely benefit users of Start 9 OS but I think people will be able to infer where to get the appropriate info from their respective node interfaces as well. Without further delay, here are the steps to get all set up to receive zaps directly to your node using your @getalby ln address: 1. I’m going to assume you have Alby as a web browser extension all set-up and also have an Alby ln address (xxxxx@getalby.com). If you don’t, I’m sure their website (getalby.com) has easy instructions on how to do so. First, you will want to click the ‘Manage your web account’ link from the web browser extension.
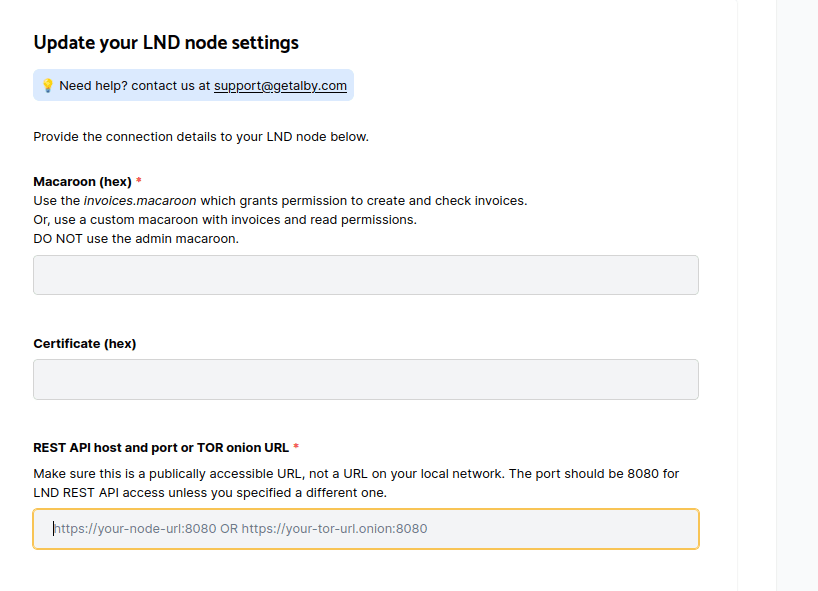
- Then, you are going to click ‘Wallet’, and scroll down to ‘Update your LND node settings’, section looks like this:
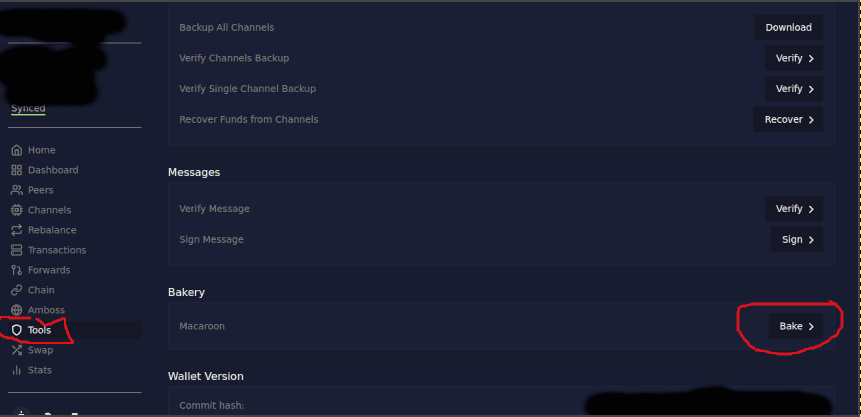
- We need to add the correct macaroon (hex). Don’t close out your Alby wallet page as we will be returning to it to input info. As the instructions outline in the image above, we are going to want a macaroon that gives just the permissions necessary for the purposes of this ln address. In order to create the macaroon, I am going to use the Thunderhub service via Start9 OS. Once logged into Thunderhub, go to the ‘Tools’ page and click ‘Bake’ in the Macaroon Bakery section.
- Once you click ‘Bake’, you will be presented with many options to choose from for the macaroon that you create. Again, we want to only grant the minimum access necessary, so just switch ‘Create Invoices’ to Yes.
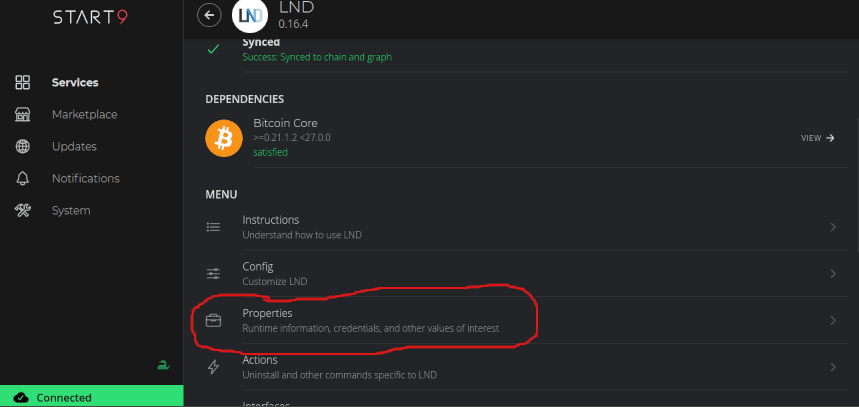
Scroll down and click ‘Bake New Macaroon’. A pop-up will appear that displays the macaroon coding. We are going to copy the Hex encoded option for our purposes. Once copied, paste that Hex encoded macaroon into the Macaroon (Hex) field on the getalby wallet page. 5. Next, we are going to grab our Certificate (Hex). Using start9 OS, I am going to go to my LND service, and select ‘Properties’
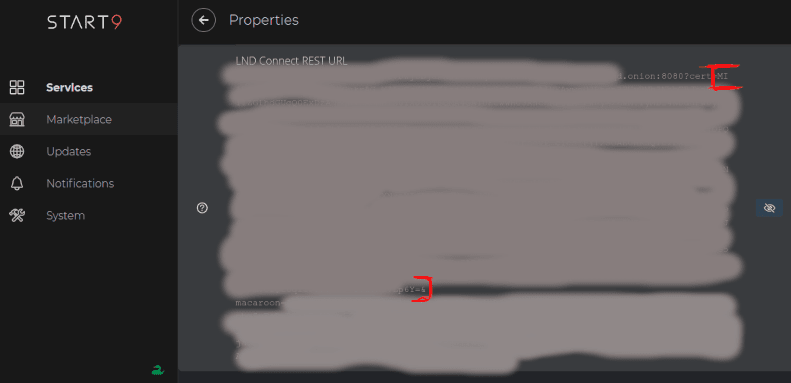
In the properties section, click the eye next to LND Connect REST URL to display the relevant text string. You will see an extremely long string on characters. For our purposes, we need to pull out the cert from this string. Right after the ‘.onion:8080’ portion of the string it says ‘cert=’. We want to copy the entire string starting right after this = symbol, and copy all the way to right before the Macaroon string starts (include the & symbol right before ‘macaroon=…’ begins).
Take this copied text and paste into the Certificate (Hex) field found on the Alby wallet page. 6. Finally, we need to obtain the ‘REST API host and port or TOR onion URL’ info from the Alby wallet page. Using start9 OS, you will return to the LND properties page. Click the eye for the LND Connect REST URL. Copy starting from the beginning of the string of text to ‘.onion:8080’ Paste the string of text into ‘REST API host and port or TOR onion URL’ field on the Alby wallet page. Before saving the page, erase the ‘lndconnect’ portion of the string and replace with ‘https’. So the string should be 'https://xxxxxx.onion:8080.
- Click ‘Update Connection’ at the bottom of the Alby wallet page. After a few seconds, the page should update with a green bar that displays the following text: ‘Successfully updated your connection details.’ You should be good to go now! 8. Test out your new feature. Send sats to your getalby address (cannot be from your LND node). Once successfully sent, check your LND node and confirm that the payment was received. You should be set now to receive zaps or sat tips form an LN address directly to your LND node

