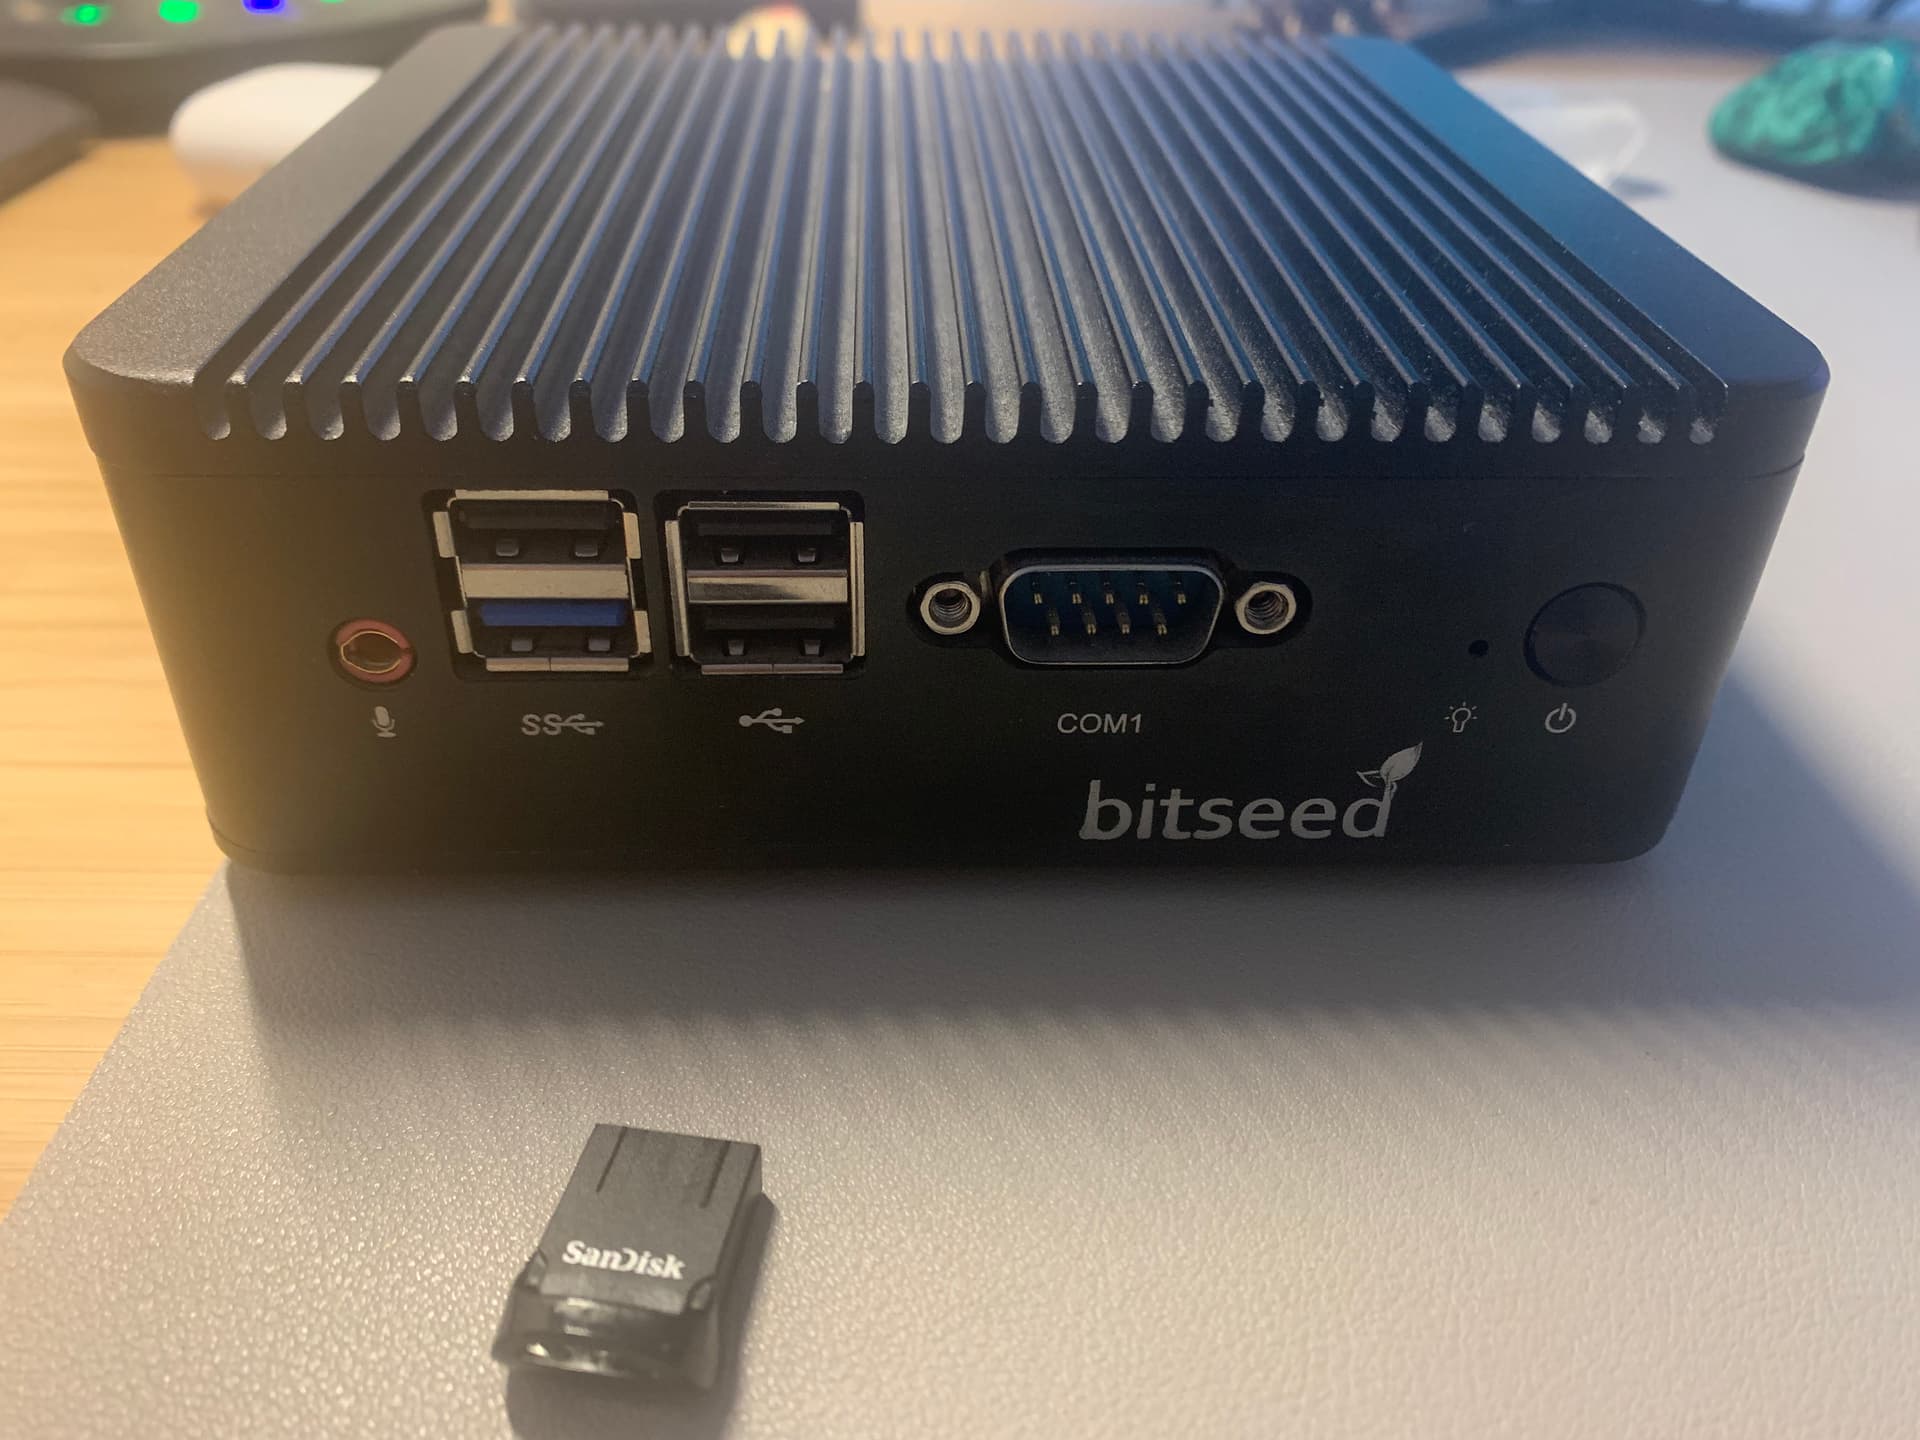
Found my old node I bougth circa 2016 (blocksize wars) and thought
I can give it a second life with this new embassyOS that everybody
is so much exited about and test a little bit. I know its not production ready
and I take full responsiblity for my actions as every sovering indvidual should.
Not sure if I ruffle some feathers but I guess it’s better to ask for forgivnes than permission.
So let’s get to it.
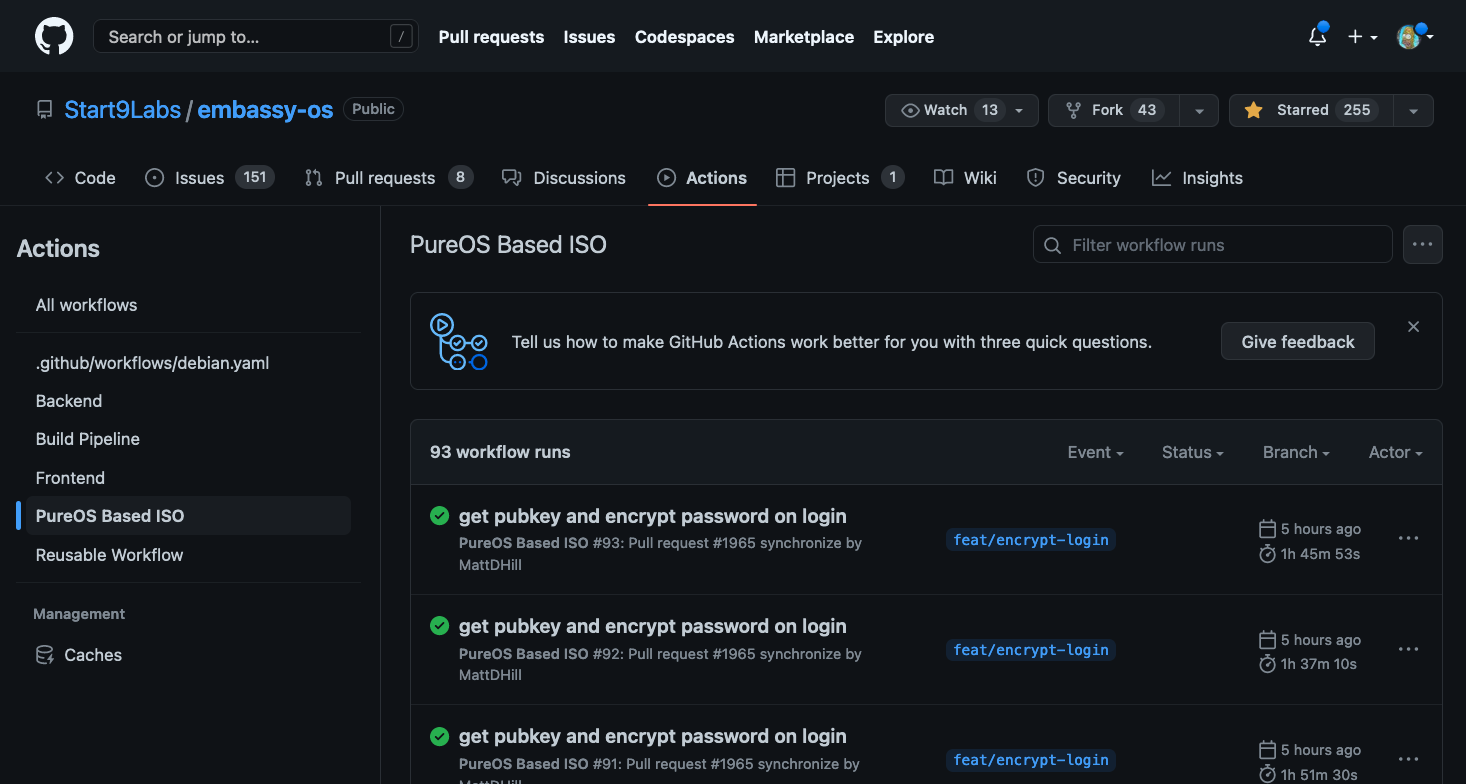
On start9 github page is action tab where you can find pureOS Based ISO.
Clicked on the image number 93 and build new iso file and dwonload it.
To flash it on my pendrive with belanaEtcher.
When all was set and done I pluged it in and power on device.
It should automaticly boot from USB if not you shold enter BIOS
by pressing delete and set device wich you want to boot from.
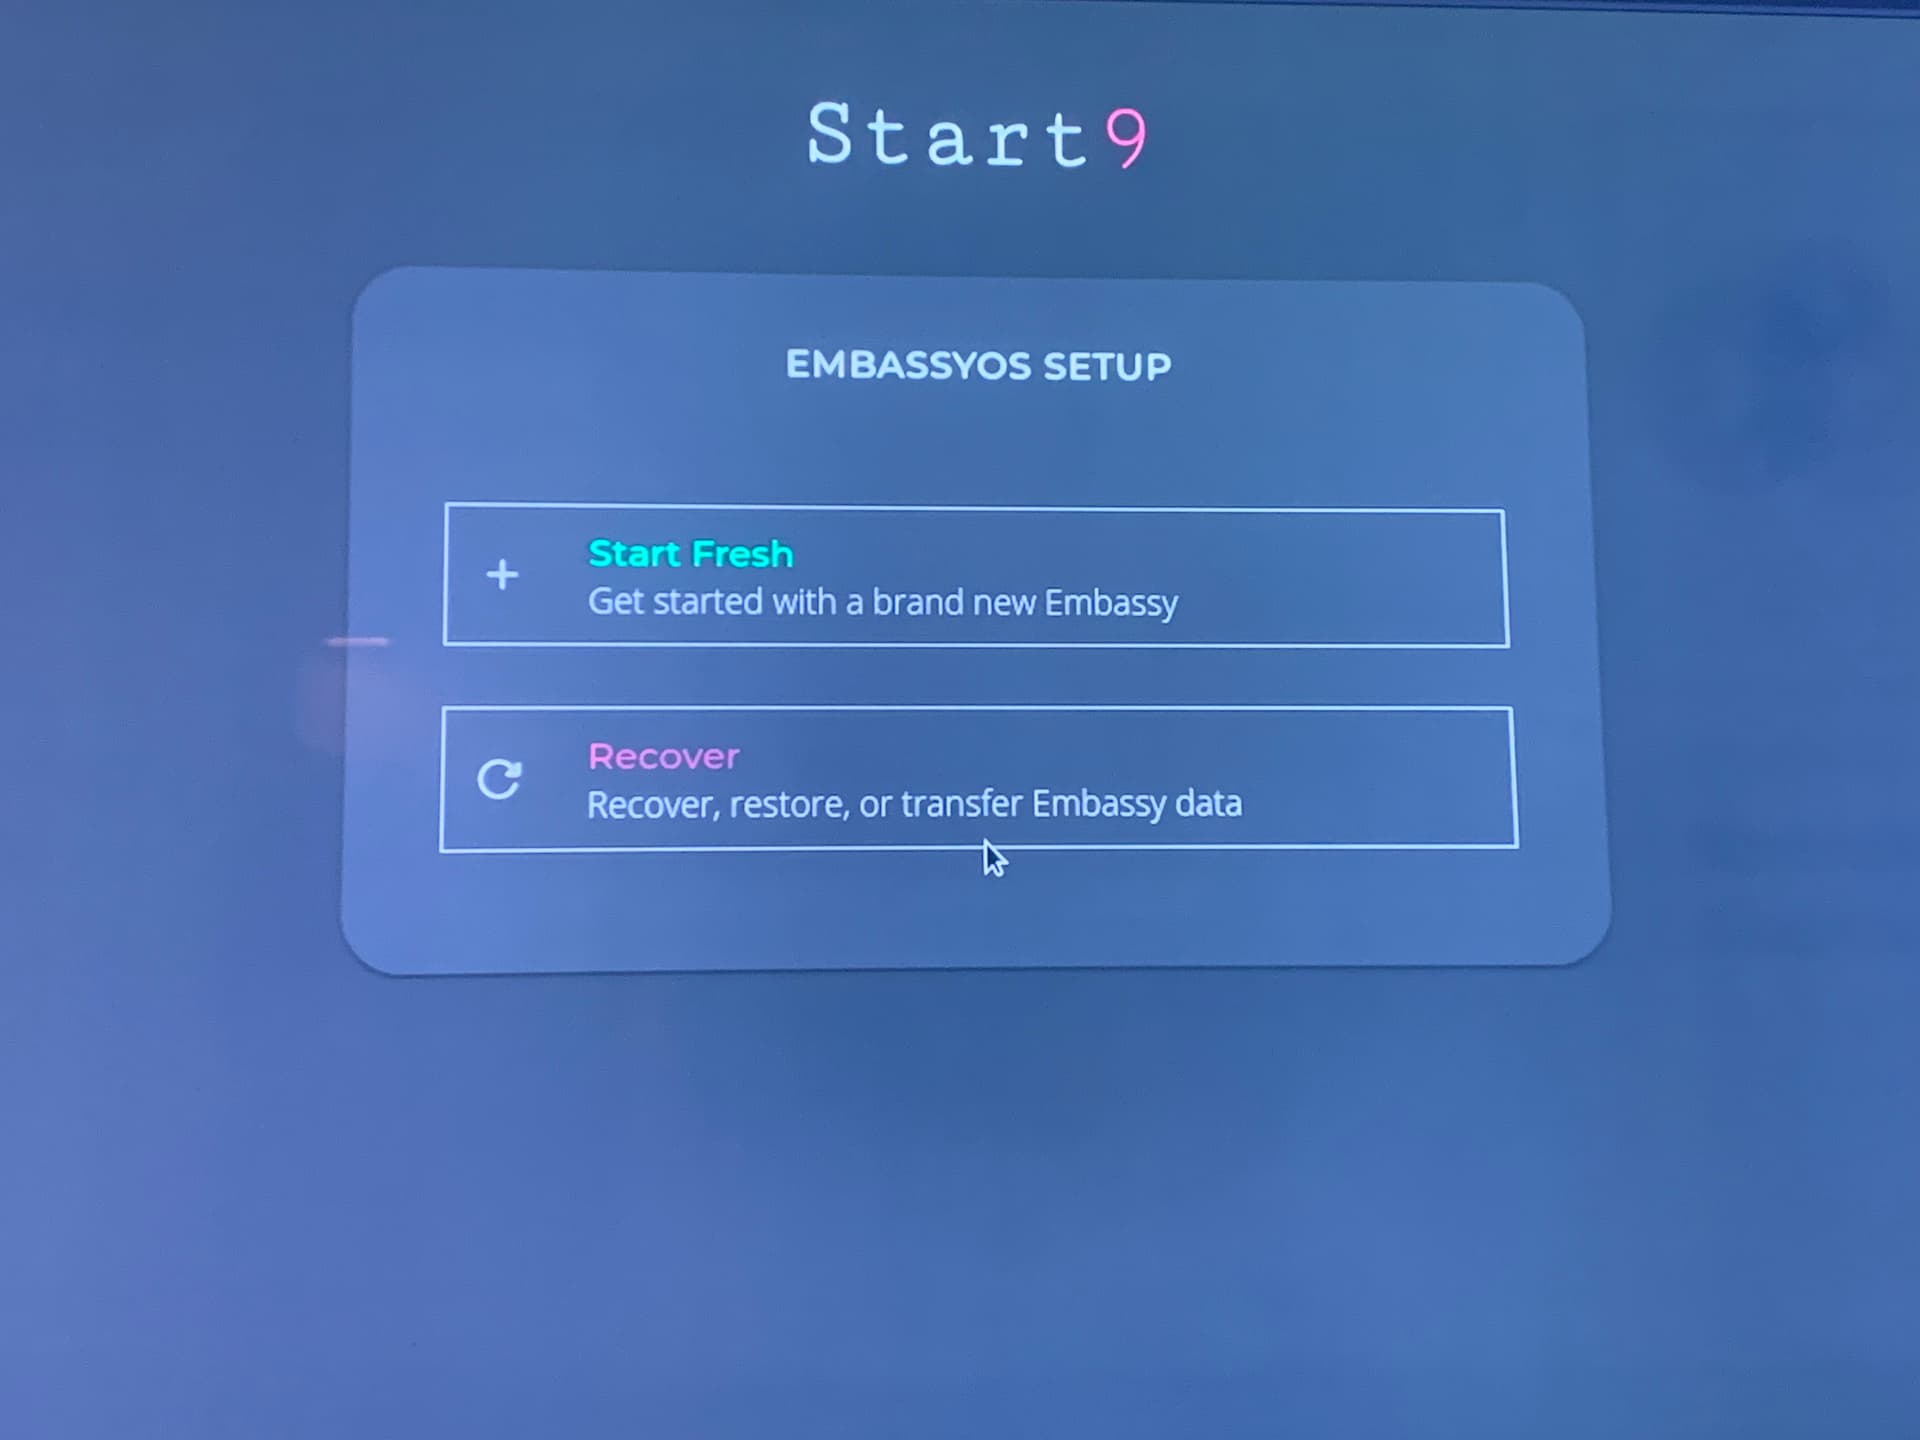
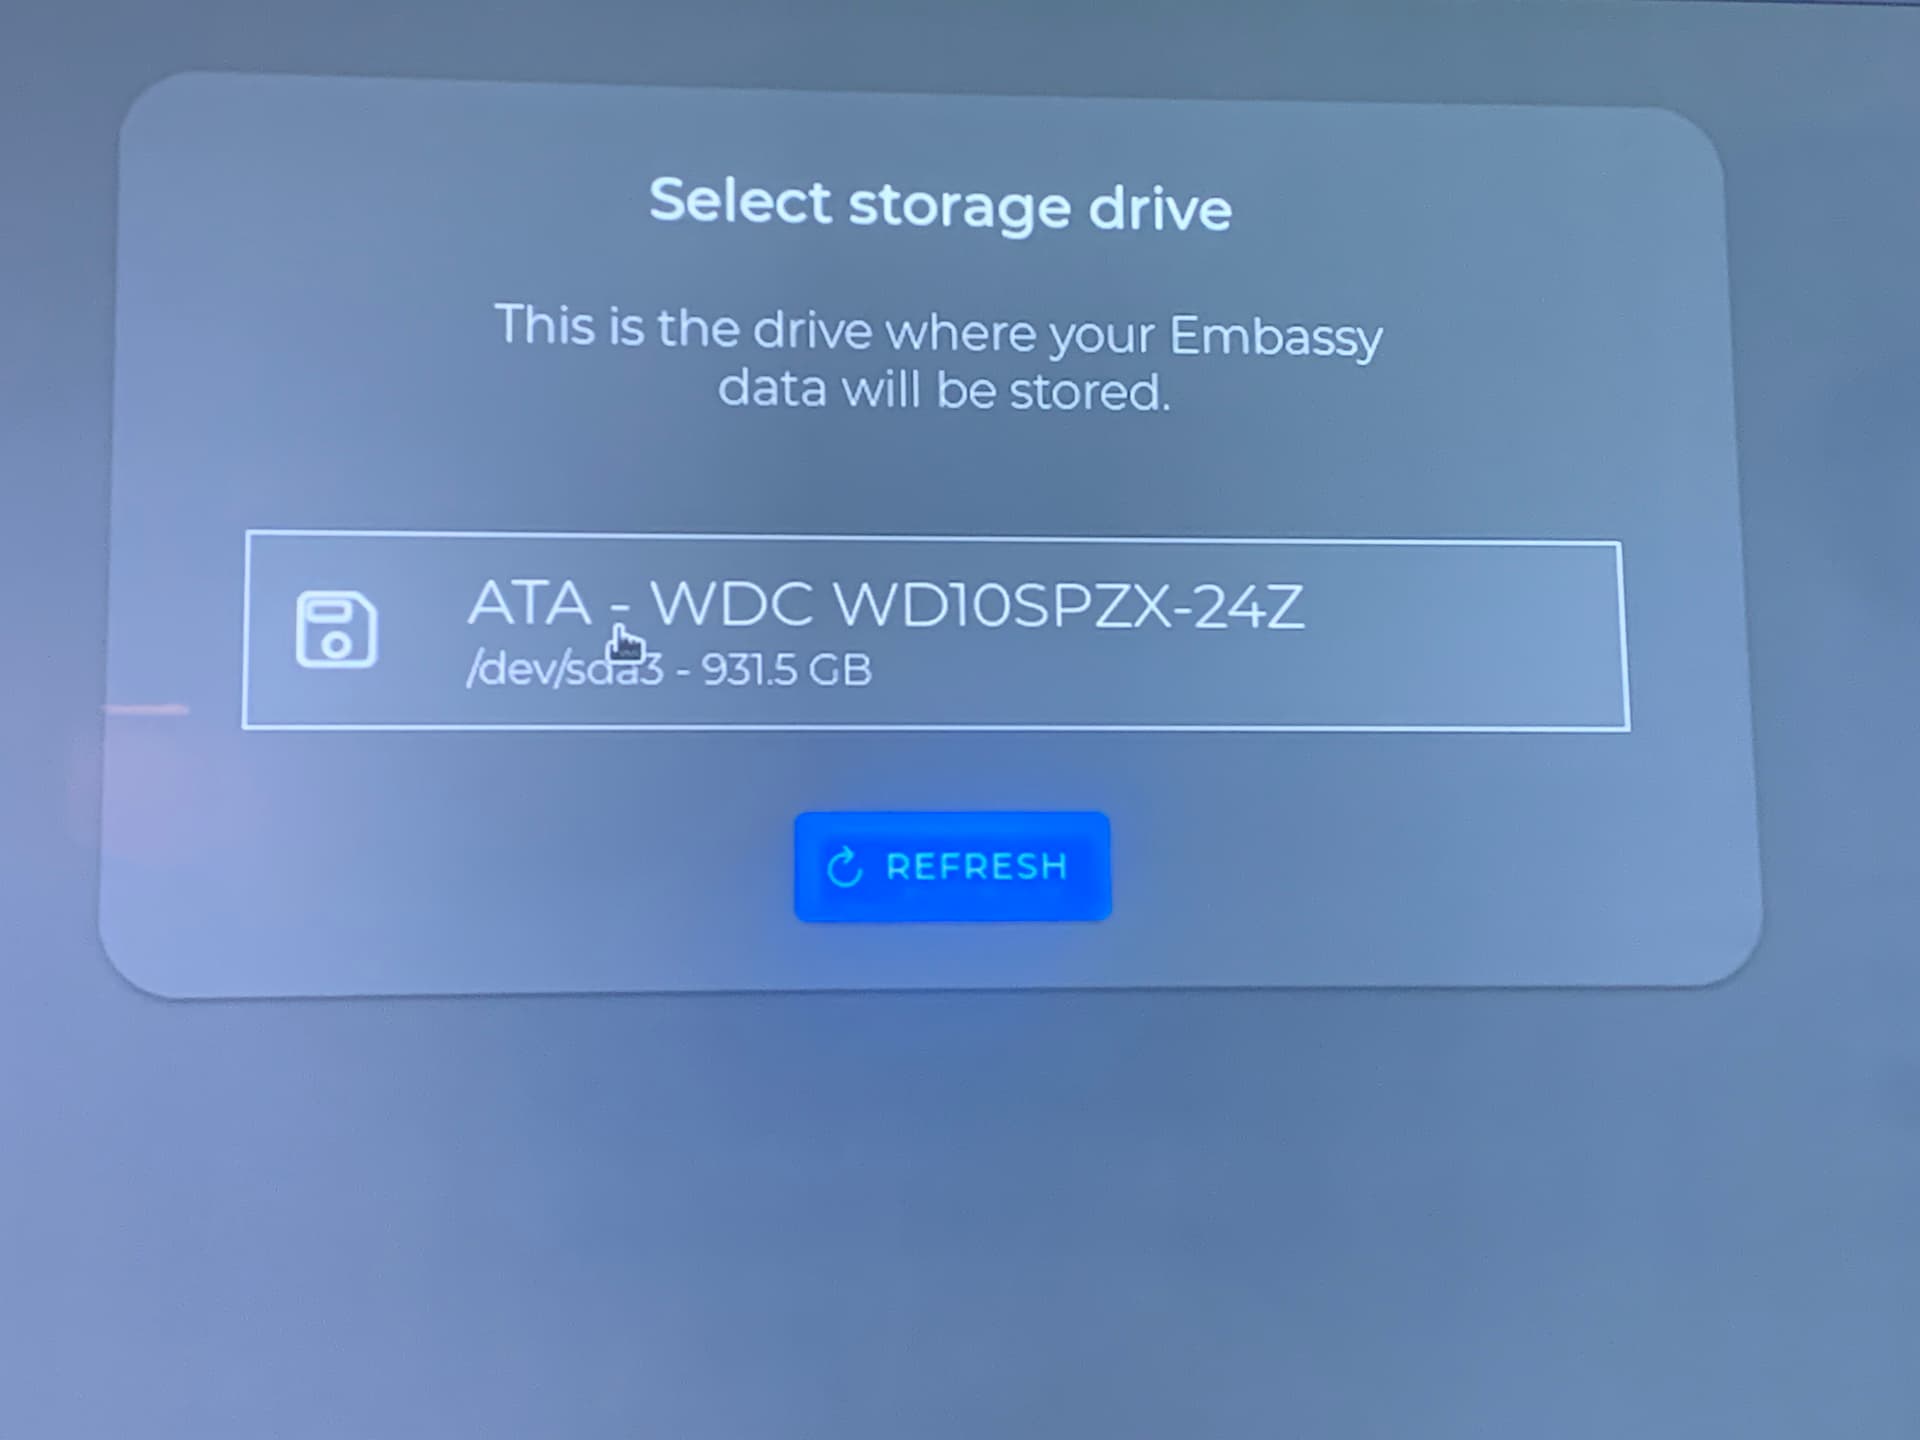
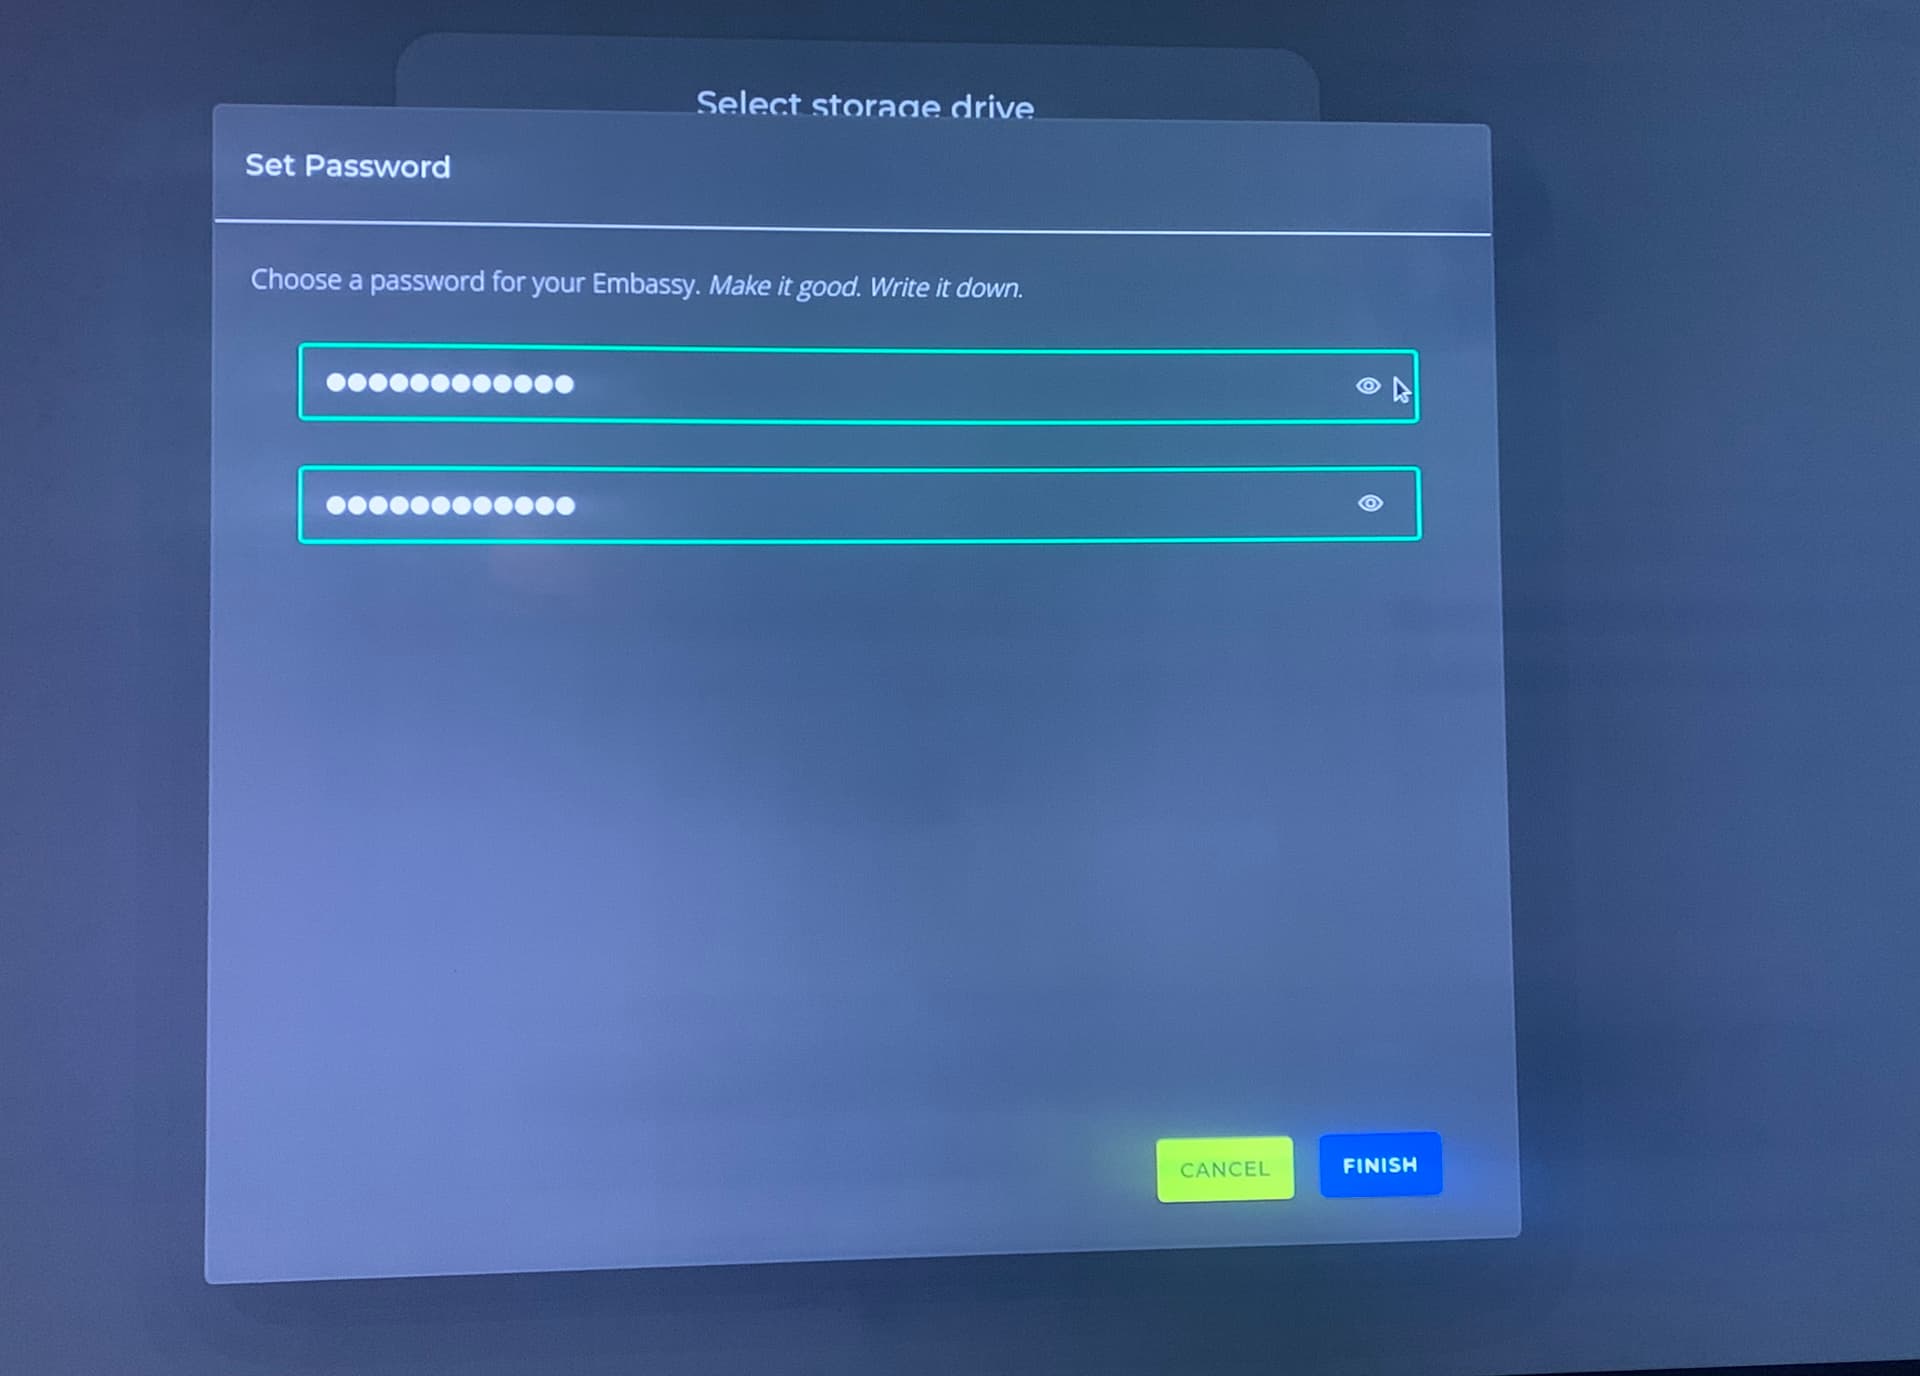
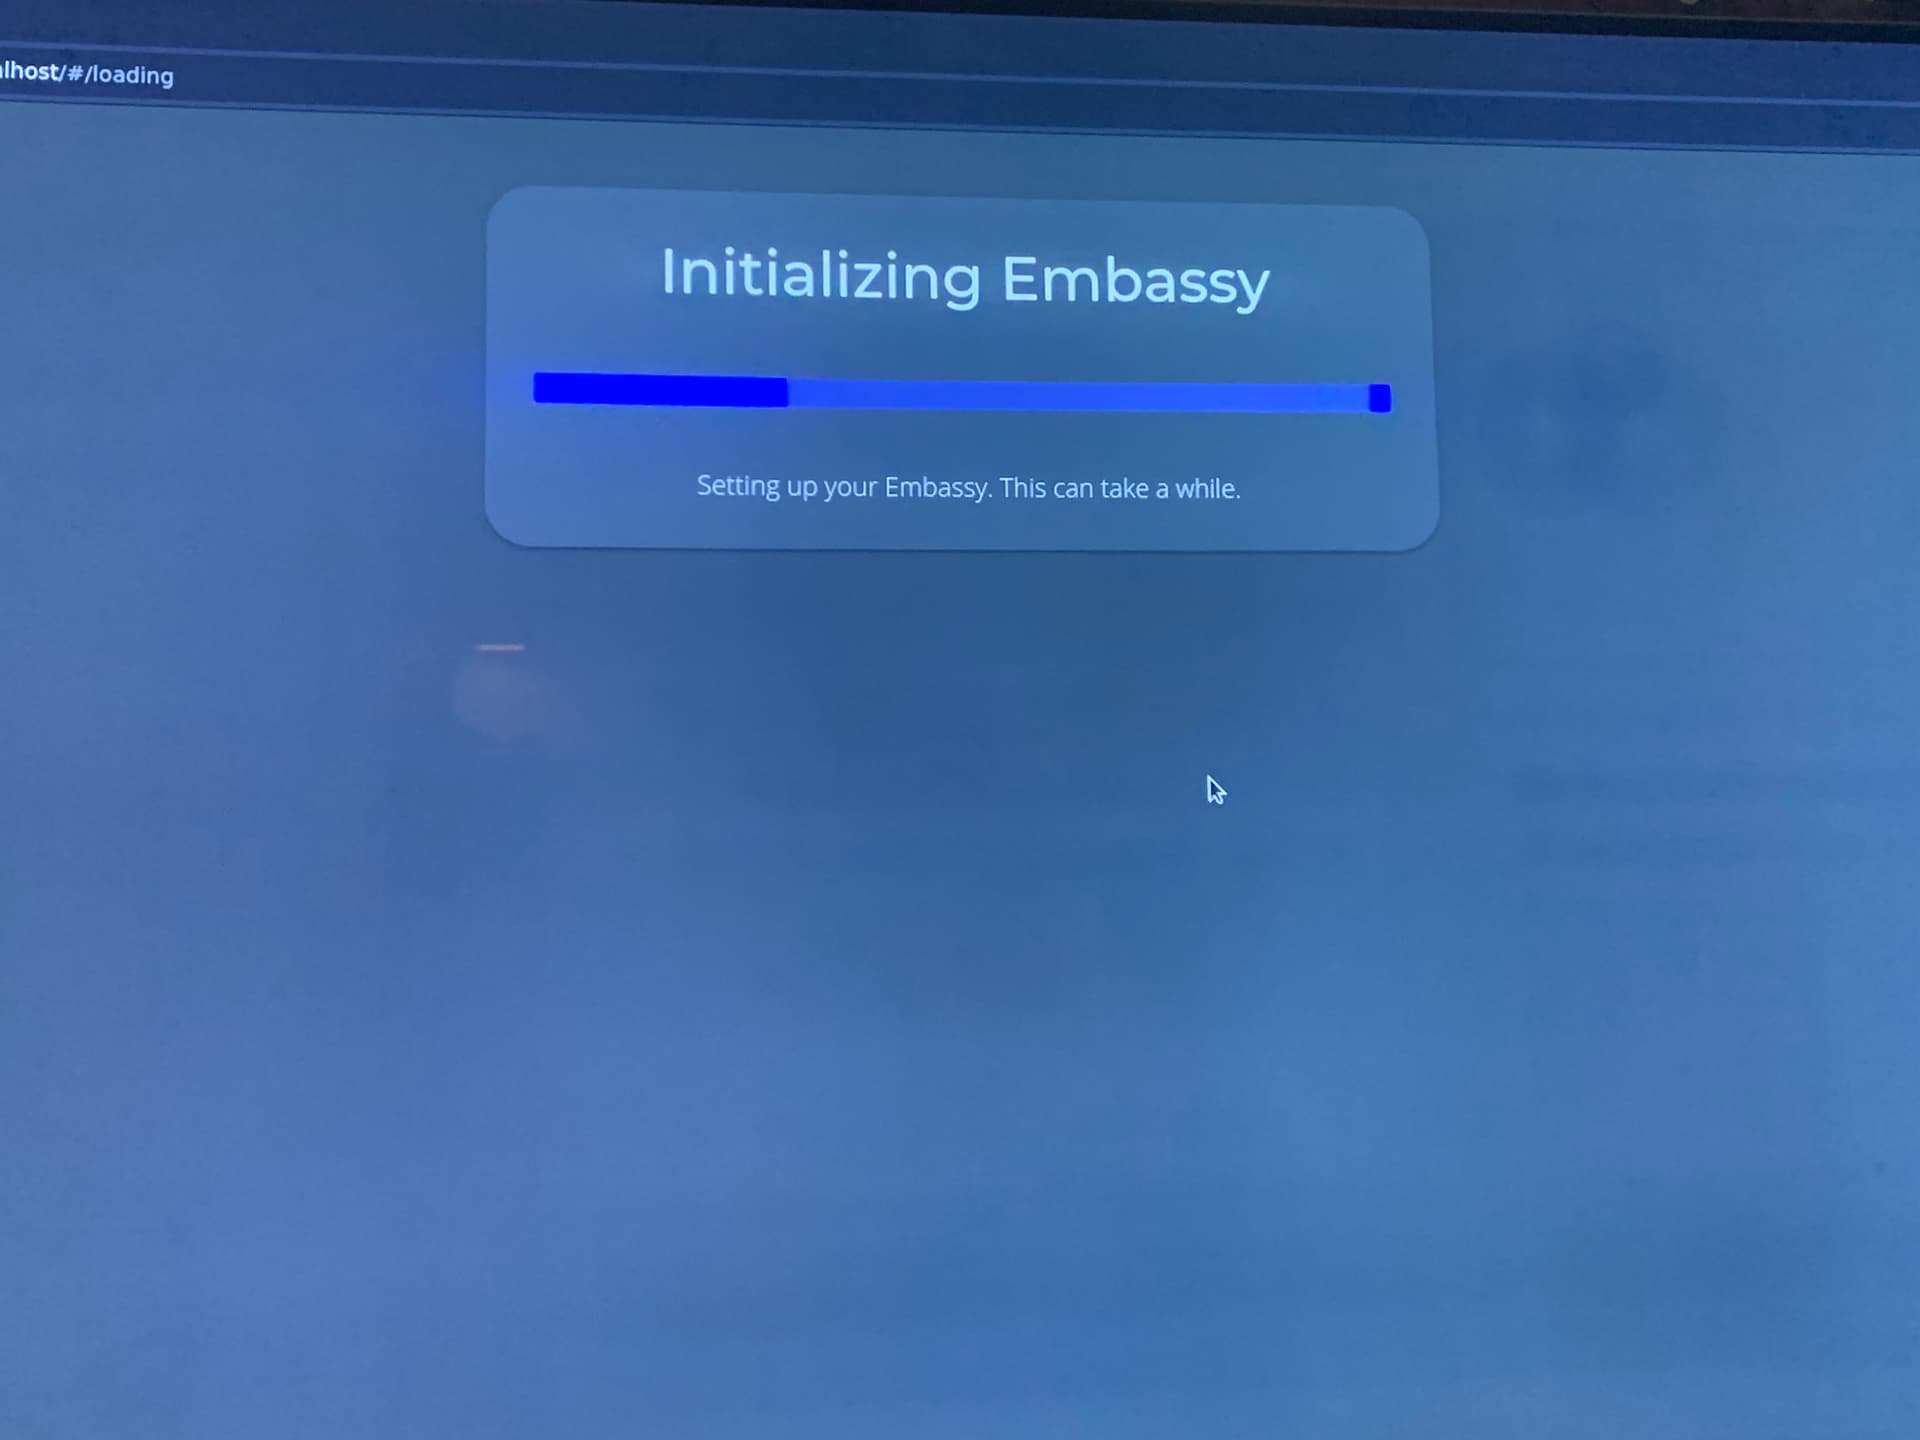
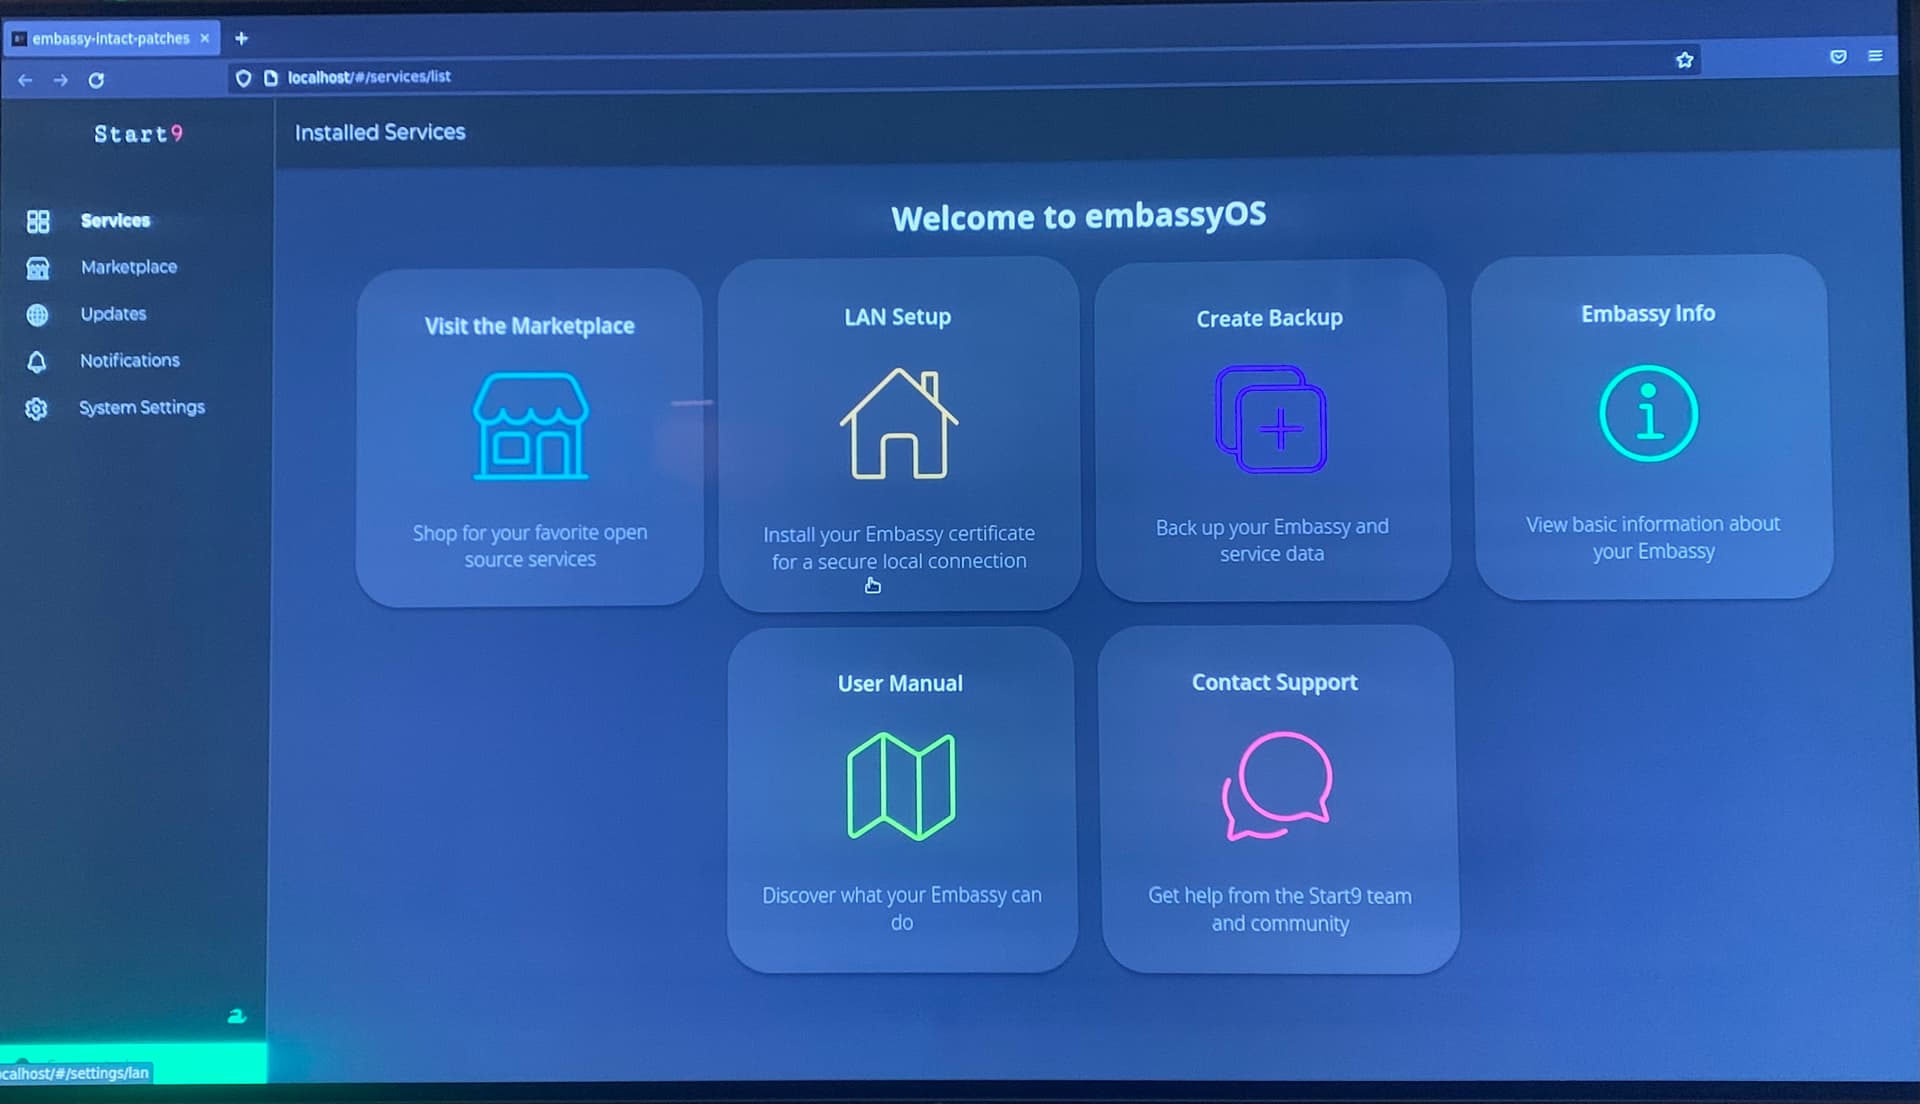
Installing flow goes as follows.
It will be a killer app. Now I mostly use vaultwarden and embassy-pages and bisq is running on my mac but it’s not ideal solution. One step at the time to soverign future. Cant wait.
H0mer, thanks for this tutorial! How did you create the ISO from the github repository? Don’t know much about using github and could not find an answer on the web. I’m trying to run embassy on an old pc.
I guess my tutrial failed. There is a pic from github page. Go to the start9Labs/embassy-os repo and open Actions tab. On the left should be PureOS ISO. Just click on the newest build and download.
Definitely just noob issues on my part. Think I got it here:
Click on the build title next to the green check mark (like “get pubkey and encrypt password on login” as shown in the tutorial images) and make sure that right below the title it says “PureOS Based ISO #…”. On the next page scroll down to the bottom under “Artifacts” section and select the text “iso” to download the ISO file.
Question: I plan on buying an old thinkpad and booting it up with embassy OS to use as a full node and to experiment with being my own server. How do I get embassyOs/what version or format does it need to be? On a usb stick?
Sorry if this is a silly question. I’m very much a newb in this space.
You should always get the latest ISO for x86_64 platforms:
Scroll down to the bottom where it says “Assets”. Please note that the guide in this thread is outdated. Using builds from github’s actions pages is no longer necessary now that embassyOS v0.3.3 has been released.
WARNING: Total Linux / Github / Tech noob
After aborting a frustrating ARM self-build because of incomprehensibly slow download/sync/retry issues (bitcoin core 30% after 2 months!), successfully flashed Start OS v0.3.4.3 on to a NUCATKC2. 1TB NVme and upgraded to maximum 32gb RAM. No other OS. No sync/retry issues, Bitcoin Core fully operational. Works flawlessly so far.
Now familiarizing myself with all the various services and proceeding with trusting of Root Certificate Authority (CA) but don’t know where to start in terms of finding terminal from which to complete the process since StartOS is a browser based OS. Several other processes I’ve looked at also seem to require some input of commands in terminal that cannot be done via UI.
This is the guide to set up SSH access, but StartOS is designed to be used from the UI as much as possible. The CLI is made available for some edge cases and for hacking around, but generally you should not need to go here unless you are doing development. Is there something in particular you are looking to accomplish?