Using the StartOS (x86) guide.
I have downloaded and verified the checksum for
startos-0.3.5.1-39de098_x86_64-nonfree.iso
I used balena Etcher to successfully flash it to a USB drive and immediately got a window/notice “the disk you attached was not readable by this computer”
Using disk utility to investigate, it was reformatted to MS-DOS (fat12)
I am trying to install StartOS on my old MacBook Pro but cannot get the flashed install USB to be mounted for the install. Am I missing something, any direction would be great. The MacBook has been completely erased with a fresh install of the Mac OS and is to be dedicated for StartOS BTC node only
I have completed 6 and 7.
Step 8, Plugging in the flashed USB does not mount on the computer. Nothing to select and open to move forward with the install. Get a window with yellow caution triangle that says “the disk you attached was not readable by this computer” I assume this is because the flash process changed the formatting of the USB to MS-DOS (FAT32)?
MS-DOS (FAT32) is a commonly supported file system across different platforms, so it’s unlikely that the format itself is causing the problem. However, it’s possible that the flashing process has introduced other changes or errors to the drive that are causing it to be unreadable. Normaly users dont have issues with flashing using balenaEtcher.
To troubleshoot this issue, you may consider the following steps:
Verify USB Drive Integrity: Ensure that the USB drive was properly flashed with the intended software and that the flashing process completed without any errors. If possible, try flashing the USB drive again to rule out any issues with the initial flashing process.
Check File System Compatibility: Although MS-DOS (FAT32) is widely supported, it’s possible that the operating system you’re using has limitations or restrictions on the types of file systems it can read. You may want to try reformatting the USB drive using a different file system, such as exFAT.
Test on Different Systems: Attempt to access the USB drive on other computers or devices to determine if the issue is specific to your computer or if it persists across multiple systems.
I am running MacOS12. It is compatible with both MS-DOS (FAT32) and exFAT.
I have erased and reformatted for MS-DOS (FAT32), exFAT and Mac OS extended (journaled)
I flashed all 3 format versions with balenaEtcher ending the process with “flash completed” and offering to flash another.
Getting the same “unmounted” drive results for each version.
I tried each of them on my brand new Macbook with none of them mounting.
Using disc utility to investigate by getting info on the drive, it is showing before flashing that there is @32GB available free space but after flashing it is full/all used up?
the guide says I need a USB at least 8GB, mine is 32GB
Is the guide wrong and I need a bigger USB drive? if so, how BIG?
When Belena Etcher finishes writing to the USB, it’s understandable that the USB is no longer recognizable to the computer you just used to do this.
Simply pull it out, insert it into whatever machine you’re looking to install StartOS on, and then continue the process.
Edit:
Looks like you’re trying to install onto the same machine you just used to flash the USB. You can’t do that with the current OS loaded, you need to restart the machine, let the USB boot and then wipe the MacOS that you already have and replace with StartOS.
StartOS is not an application you install on MacOS, it’s full OS replacement. The MacBook needs to be turn off to being the process.
Thanks, I am trying to install on the same machine. I didn’t realize I needed to boot from the flashed drive/replace the existing MacOS.
So, I booted from the usb and after running through a bunch of line/code I got my first “install window”
I stepped through them:
Select disc>internal
Install Start OS
Warning/erase etc.> continue
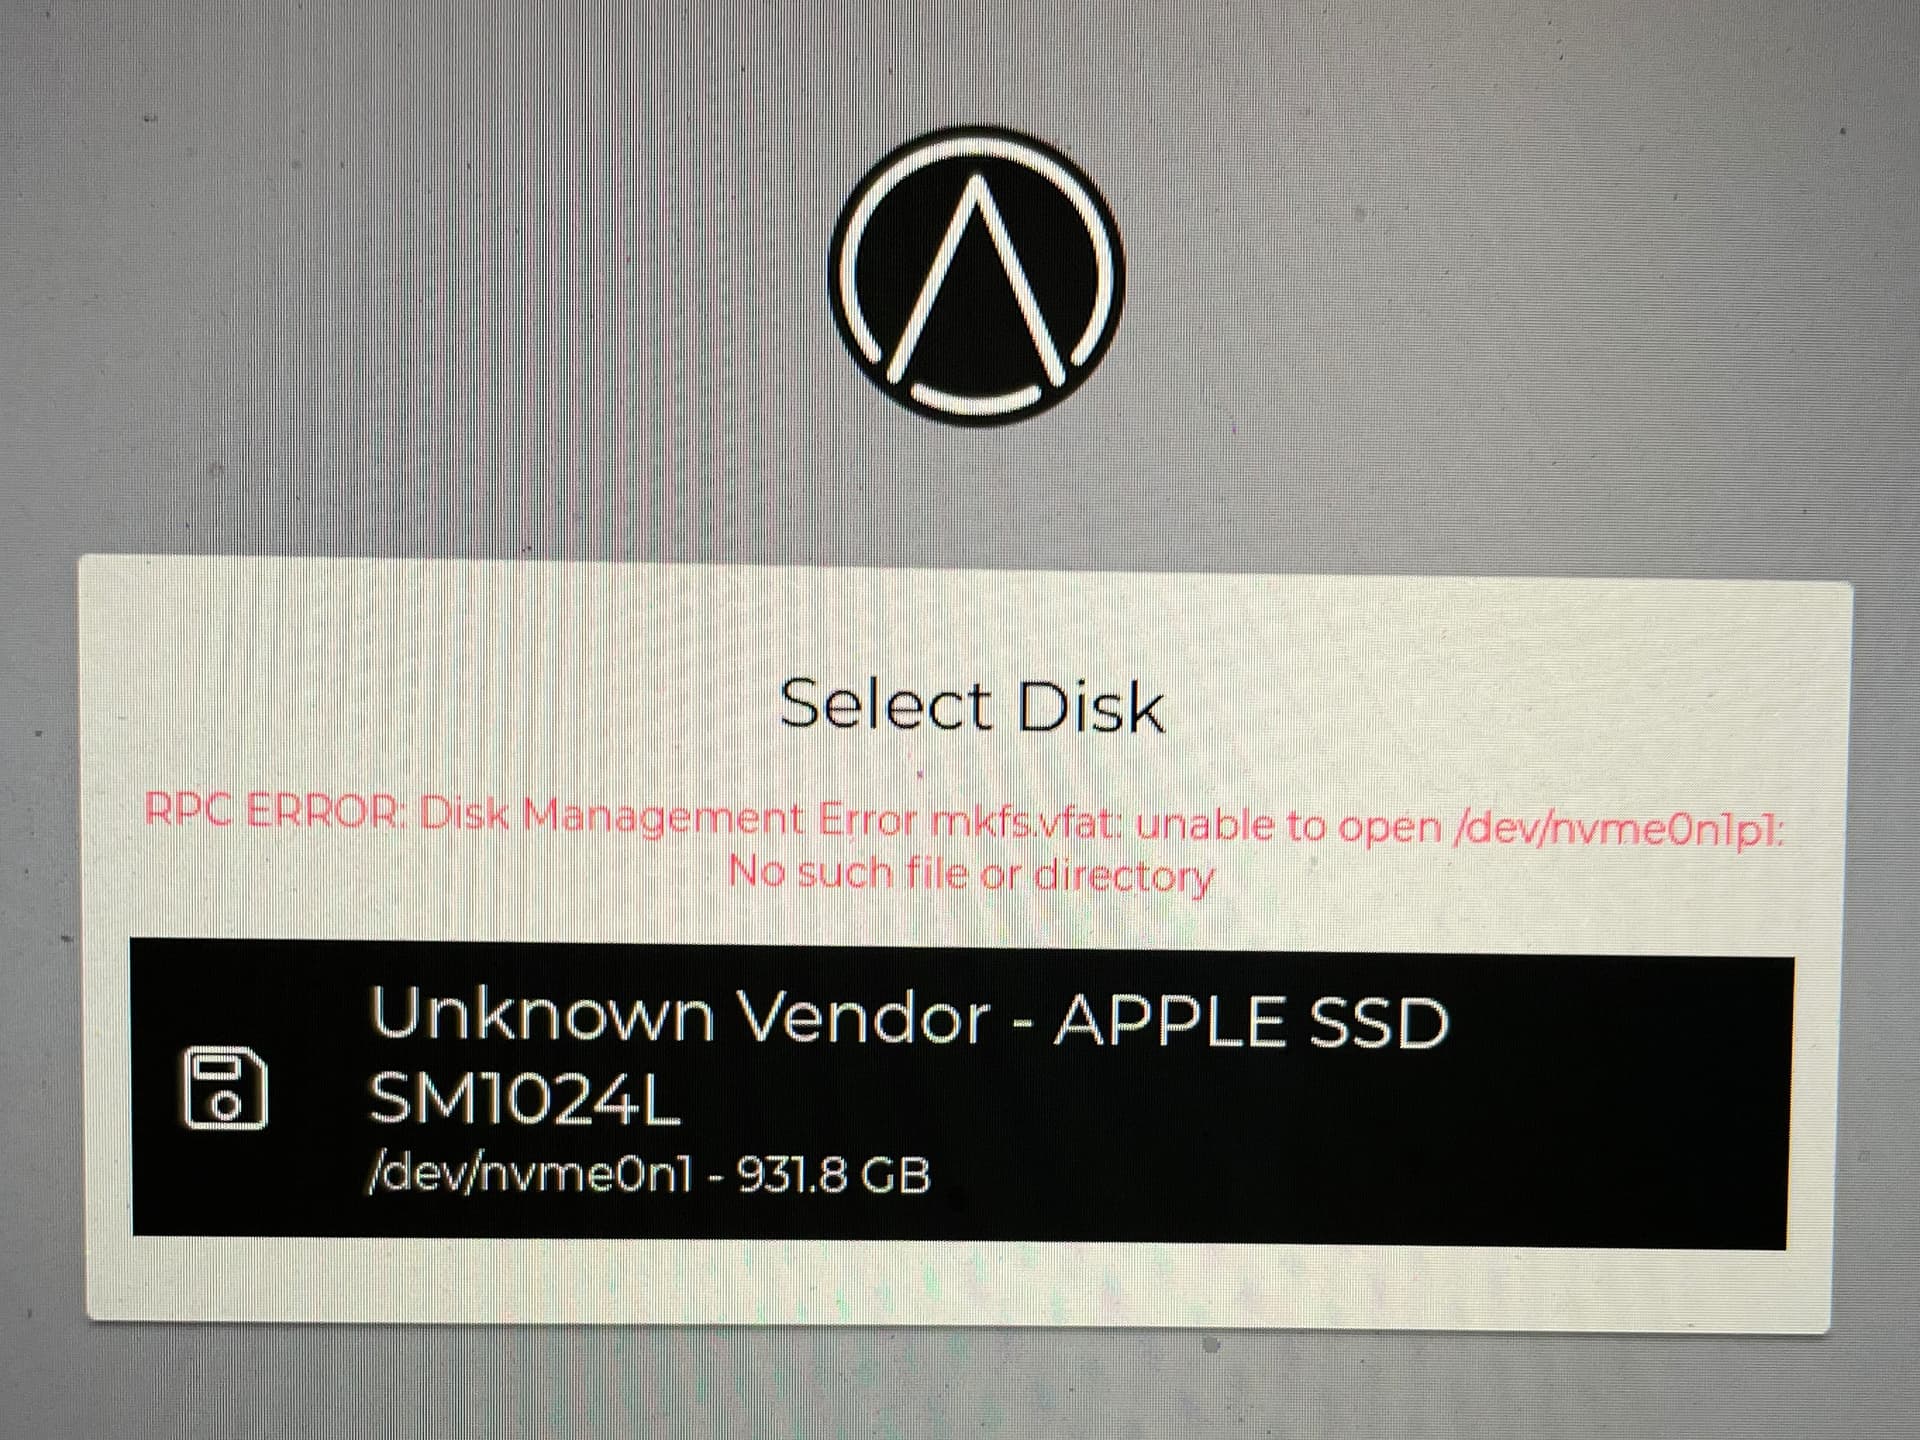
Next window was “Install Type” with “Install StartOS” as the option to select and move forward but it has a red message "RPC ERROR: Disk Management Error mkfs.vfat: unable to open /dev/nvmeOnlpl: No such file or directory
Selecting install just takes me in a loop back to error message.
FYI: Original MacOS no longer available to boot from and I need the USB plugged in to try install again, I’ve tried a couple more times
Thanks for any guidance. Have no idea how to move forward?
I have worked with computers for a long time but never with anything like this, feel like a noob!
Disk partitions can be fiddly and annoying to work with. In most cases StartOS is able to see a disk, wipe the existing partitions and then create the new partitions it wants to. But sometimes it gets into trouble.
Me, as a bit of a control freak, always manually take out my disks, attach them to another computer and create my own single fat exfat partitions before putting them back in.
You, with a MacBook, probably want to cry just thinking about that. So, a quick way to replicate this process, is to temporarily make the Mac be that “another computer” To do this you flash another USB stick with a live boot Linux (a quick search will probably throw up Ubuntu first, which is fine).
Insert that USB instead, let that boot, and you now have a full linux experience to work with.
You can do 1 of 2 things…
Simply install the Linux. Any setup options. Just make sure it installs. When done and it says to pull out the USB and restart, instead, pull out the USB, insert the StartOS USB and restart.
If you don’t have 30 minutes and are happy to get your hands dirty.
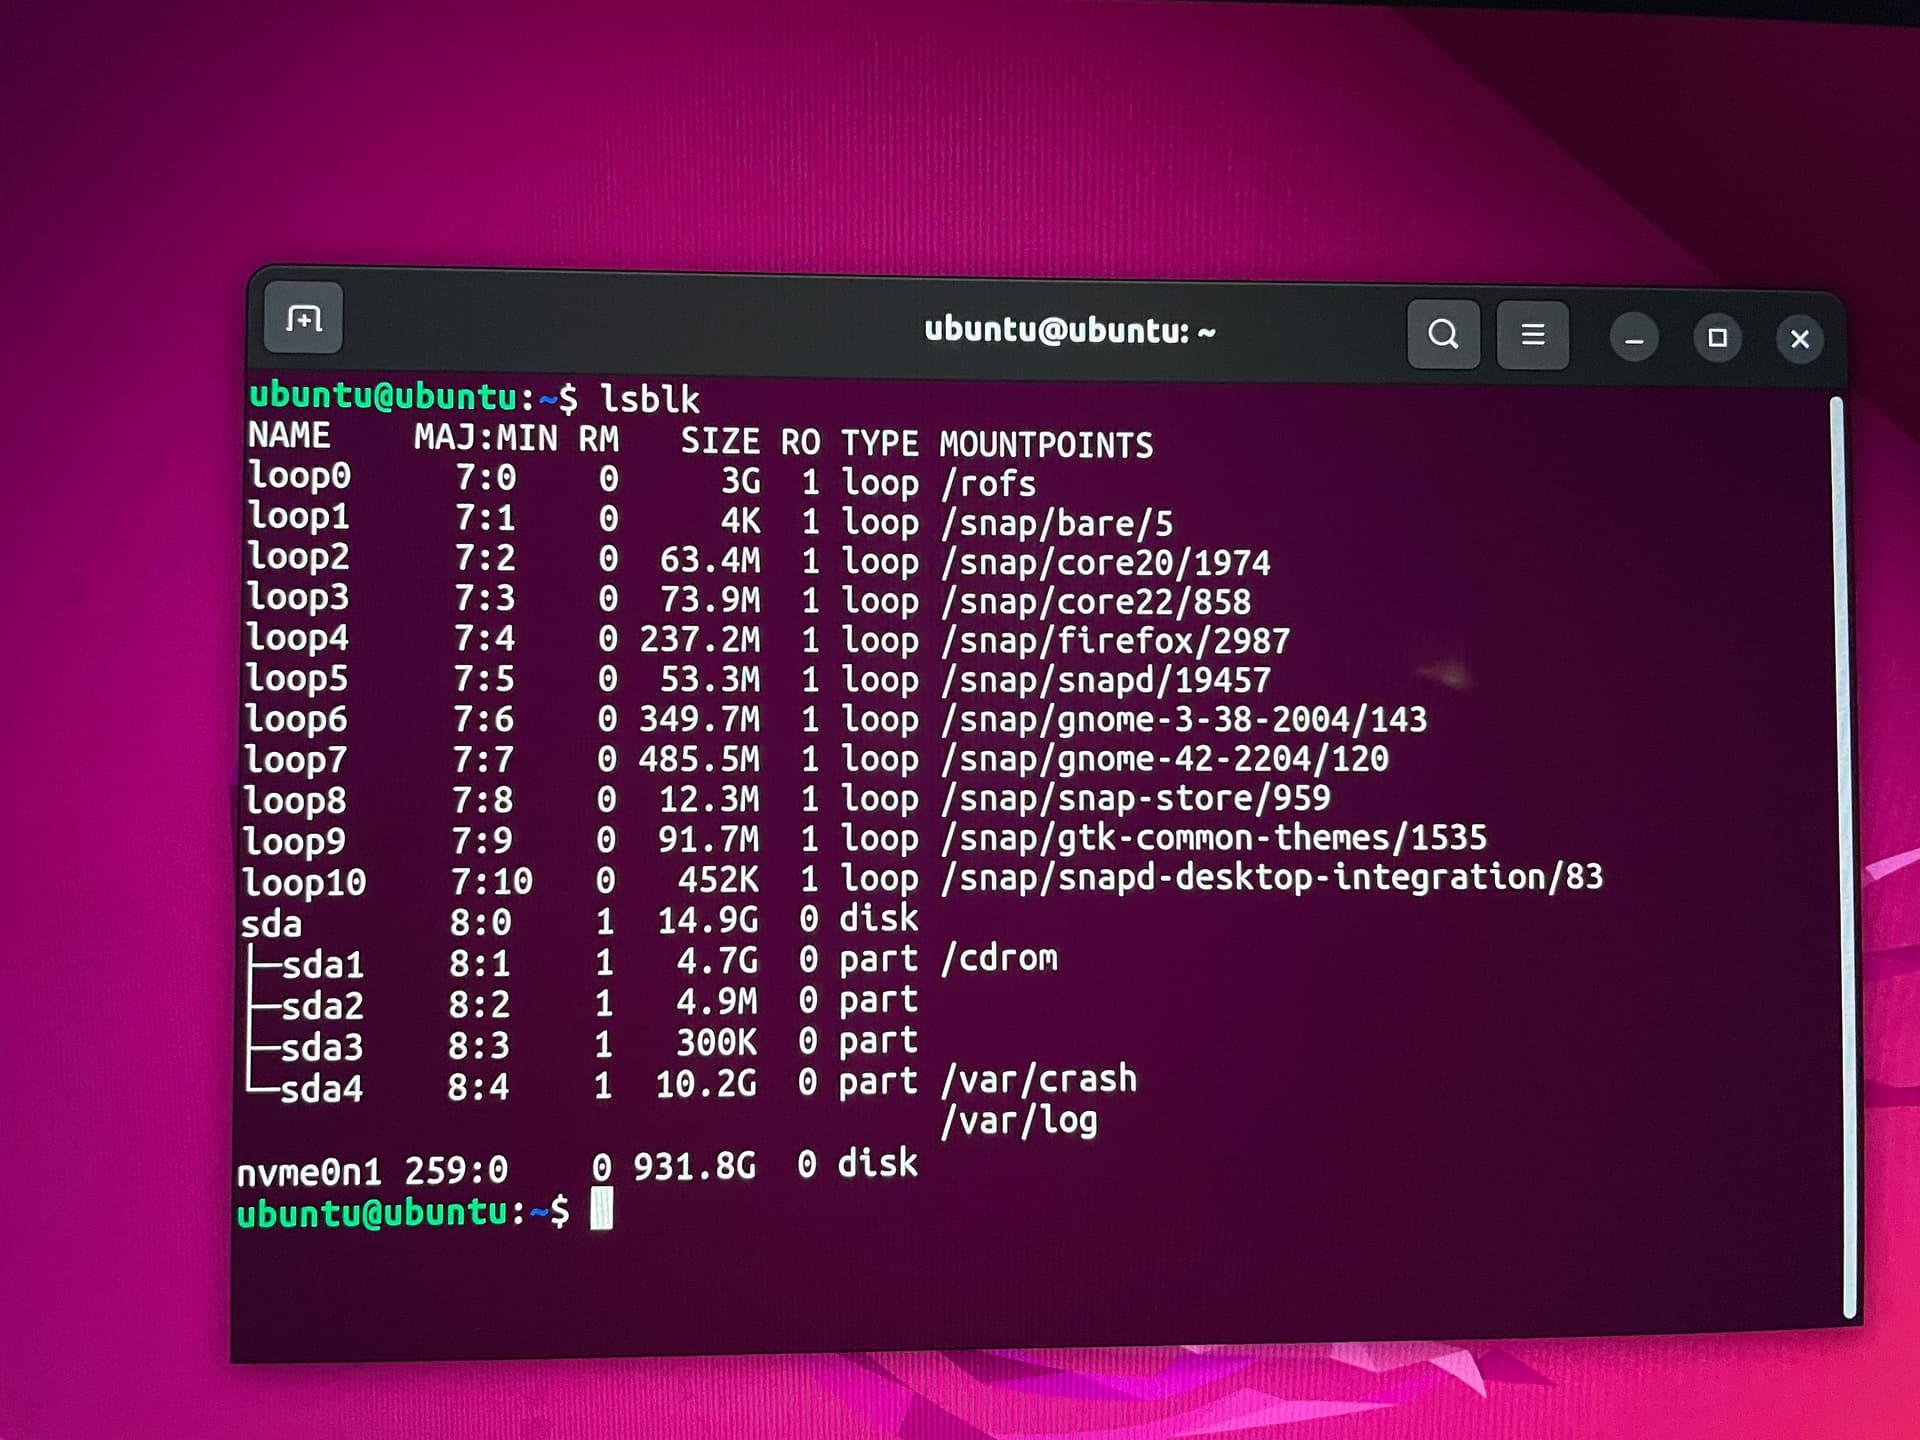
Your MacBook’s disk appears to be /dev/nvmeOnpl.
Open a command line window, confirm the above with lsblk
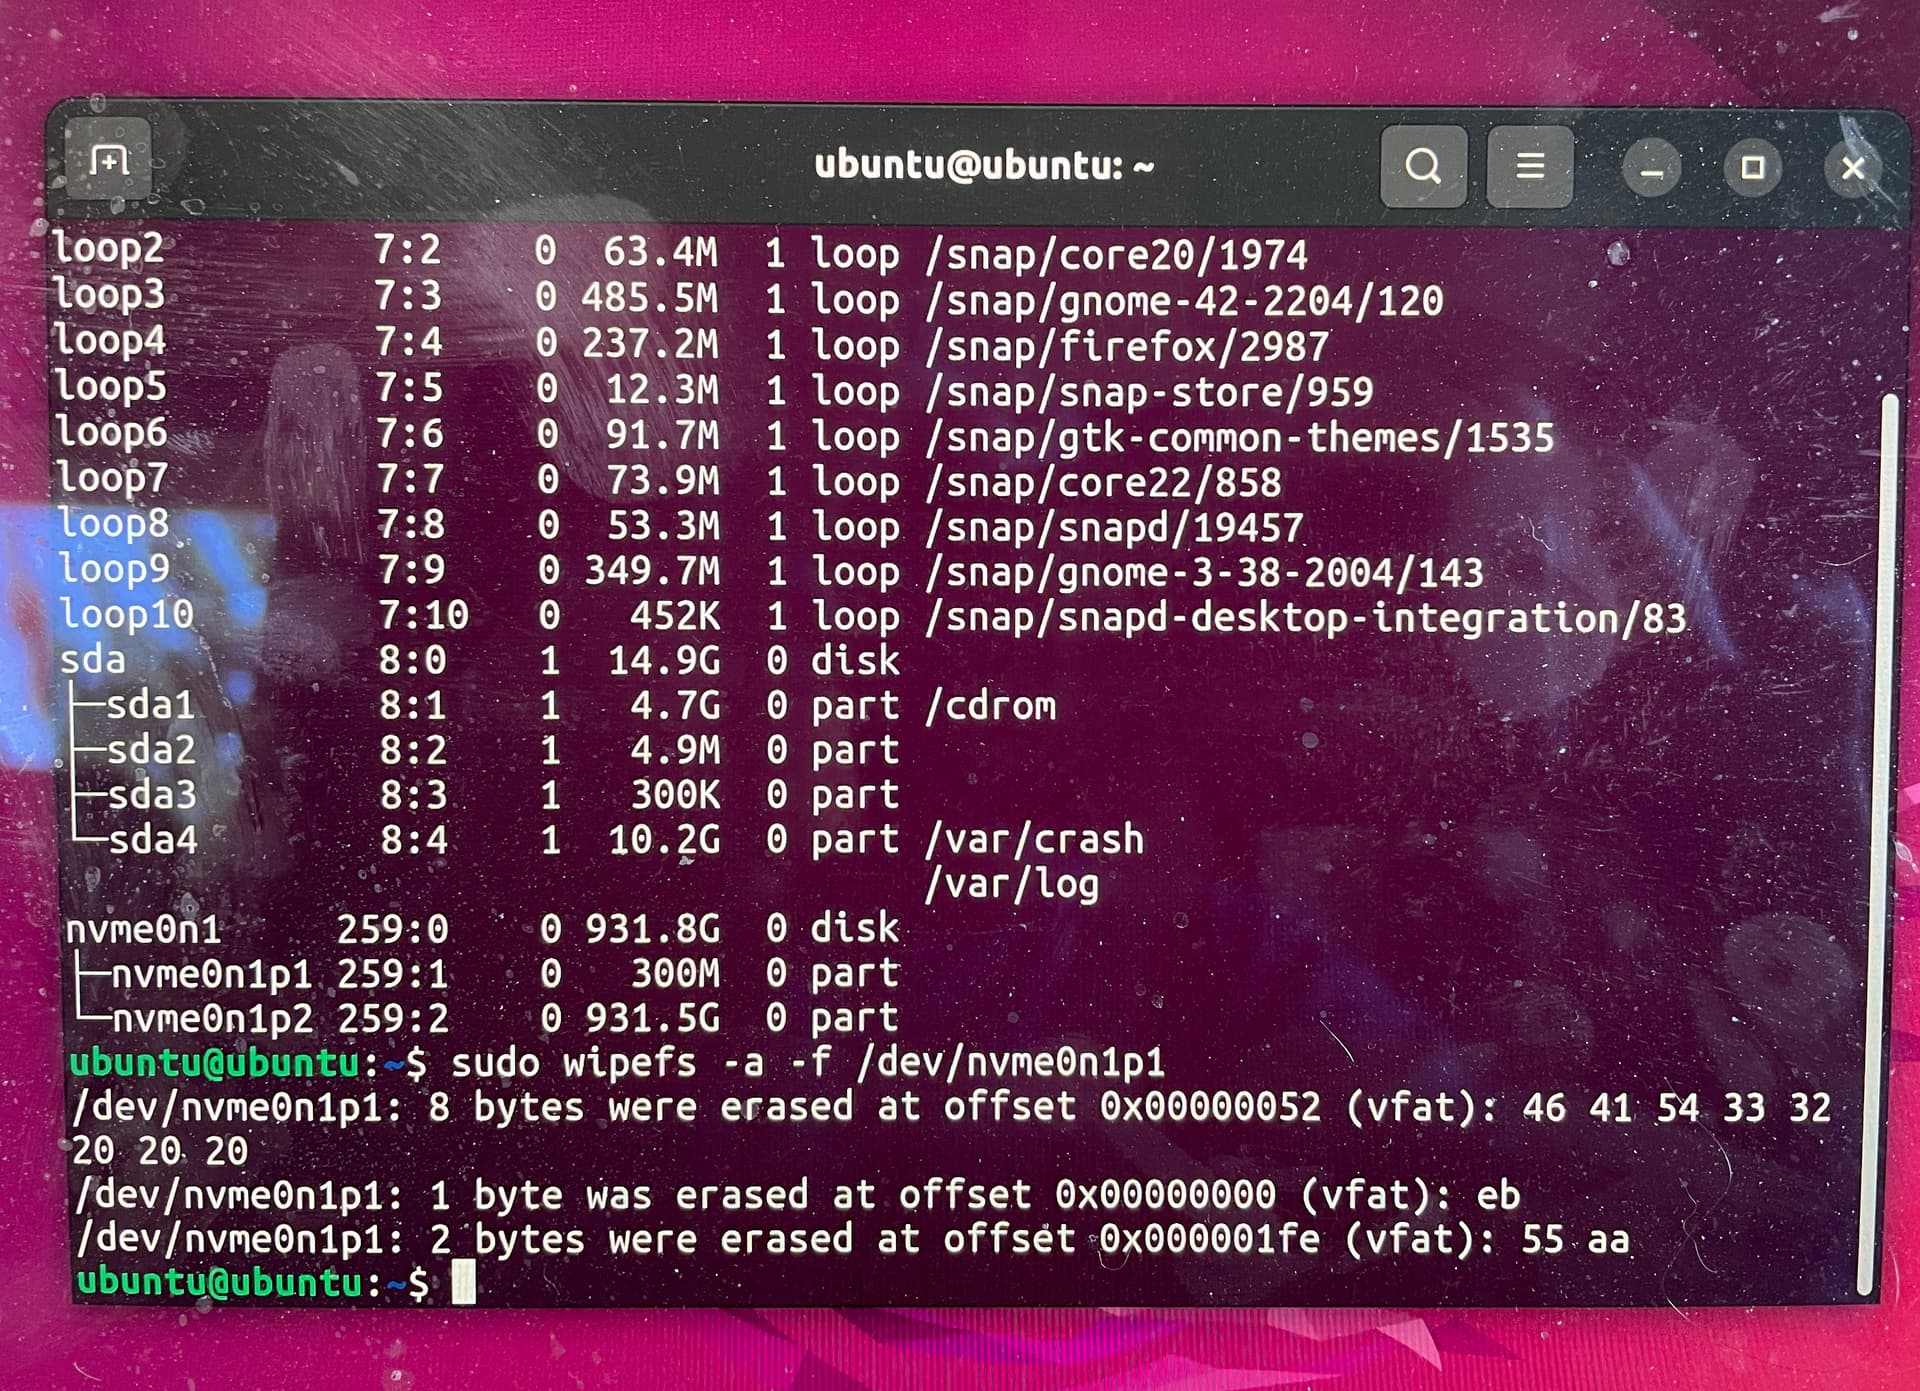
When you’re happy that your know which one is your internal nvme drive run… sudo wipefs -a -f /dev/nvmeOnpl (or whatever the disk is named)
Turn off the Mac with sudo shutdown now
Take out the generic linux USB. Put in the StartOS USB, then continue as per the guides.
I tried both your suggestions with the same result / error message as before.
RPC ERROR: Disk Management error mkfsvfat: unable to open /dev/nvme0n1p1
I re-installed the Mac OS before trying each option
On option 2, I used UBUNTU in the try mode versus install and ran the commands as recommended.
I did this twice because I noticed that the disk name to select for install is named /dev/nvme0n1 and the error message was unable to open /dev/nvme0n1p1.
I sudo wipe’d /dev/nvme0n1 and got same error.
Reinstalled MacOS and went through it all and then did the sudo wipe on the “sub” /dev/nvme0n1p1
My MacBook Pro is on the list of hardware that has worked for to StartOS.
It would have been useful to see the list of mounted devices after running wipefs to see if those p1 and p2 partitions survived. I think they have because you didn’t then format the disk. I think if you’d then create a partition you might get the result you’re looking for. Can we try that?
As far as creating a new partition I have only ever done that on the MacOS side using disk utility. So I have no idea at what time in this process to do it and how?
The GUI program contains all these tools. You only need one partition, StartOS is going to wipe it anyhow. So just wipe the whole thing and give it one partition.